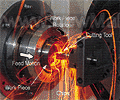
A hard turning research project has been completed at Cranfield University in collaboration with Cranfield Precision - Division of Landis Lund, undertaken as part of an EU Framework 5 project (ULTRAFLEX). The main automotive partner companies were the research organisations of FIAT (CRF), Renault (Regienov) and Nissan (NTCE-UK).

The objective project was to investigate the process for the machining of finished alloy steel surfaces with optical quality, in the order of 10nm Ra, for automotive transmission components such as the drive surface of a continuous variable transmission (CVT) shaft.
From a review of work to date, average roughness achieved on precision machine tools is in the range of several tens of microns.
However, work undertaken by Knuefermann (1), on the ULTRAFLEX project, using a high precision lathe of high dynamic stiffness (DeltaTurn 40) developed by Cranfield Precision, showed that it was possible to obtain 10nm Ra surfaces for short lengths by hard turning.
Achieving these surfaces consistently over longer cuts proved to be very difficult, although surfaces of 20nm Ra were achieved consistently over long periods. The main factors affecting the surface finish were tool defects, machine vibration, and the cutting parameters.
In spite of these difficulties Knuefermann concluded that hard turning was highly deterministic when using an ultra stiff hard turning machine such as the DeltaTurn 40. He developed a new numerical model for surface roughness generation that showed that surface roughness and topography could be predicted very precisely assuming one has appropriate knowledge of the process disturbances.
For example, as well as the standard cutting parameters, other necessary inputs are defects on the tool cutting edge, such as their height (or depth) and width. These affect surface roughness more than any other factor at medium feeds, and at low feeds machine vibration also contributes significantly to surface roughness.
Extremely good correlation with extensive cutting trials was obtained when these inputs were included in the model.
In order for ultra precision turning to be exploited outside the research laboratory, several developments are necessary. These include an improvement of the quality of the edges of hard turning tools, to a level that currently is commercially available only for monocrystalline diamond tools.
In addition, tool defects need to be reduced considerably and it would be extremely beneficial if the manufacturers of the cutting tools specified the defect level so that this data could be used to predict the machined surface roughness.
It is also apparent that for ultra precision applications, the dynamic properties of current hard turning machines need to be improved significantly.
High dynamic stiffness, which requires appropriate damping properties, is required to avoid the tendency of the cutting tools to chatter at low feed rates. #p#分页标题#e#
Manufacturers and users of less precise machine tools may also use results of this work - such as information regarding the edge effect and machine vibration on surface roughness.
Machine/tool 'fingerprints' can be generated from Knuefermann's work which plot the expected surface roughness against feed,. These can be applied to ensure that the machine achieves its maximum potential.
相关文章
- 2021-09-08BIM技术丛书Revit软件应用系列Autodesk Revit族详解 [
- 2021-09-08全国专业技术人员计算机应用能力考试用书 AutoCAD2004
- 2021-09-08EXCEL在工作中的应用 制表、数据处理及宏应用PDF下载
- 2021-08-30从零开始AutoCAD 2014中文版机械制图基础培训教程 [李
- 2021-08-30从零开始AutoCAD 2014中文版建筑制图基础培训教程 [朱
- 2021-08-30电气CAD实例教程AutoCAD 2010中文版 [左昉 等编著] 20
- 2021-08-30电影风暴2:Maya影像实拍与三维合成攻略PDF下载
- 2021-08-30高等院校艺术设计案例教程中文版AutoCAD 建筑设计案例
- 2021-08-29环境艺术制图AutoCAD [徐幼光 编著] 2013年PDF下载
- 2021-08-29机械AutoCAD 项目教程 第3版 [缪希伟 主编] 2012年PDF